Showing posts with label projects. Show all posts

Tuesday, October 18, 2011

Time to make lemons

Well, thankyou for bearing with me after my short post earlier! I was so excited to be featured I just wanted to let everyone know, but had to get back to the clinic. If you are visiting from 36th ave. then its a pleasure to meet you! If you wanna know more about me or this blog then click "the halls" to get all of the deets!

I know I've posted many pictures of our house, but I haven't shared one of my favorite parts of the house. When I started my OB/GYN rotation back a year ago I spent a week on night float and 3-4 really crazy weeks that we didn't get to see much of each other. We didn't like not being on the same schedule, but we decided to find a way to make things better...and the result is one of my favorite parts of our house.

First thing, a chalk board to write short notes to each other!

Second, a love tree. Exclusively for little love notes

I love going back and looking at our notes later.
 

I even love the supplies. clothes pins and milk glass and chalk. Oh My!

 These were so easy to make. Grey cardstock, off white card stock, stamp, gold ink.
The stamp says "Uniquely Handmade limited edition". I thought it fit.


So thats it, my favorite part. Funny how its never the expensive lighting or appliances.

Wednesday, August 31, 2011

Faux Wallpaper

Well. It was simply a matter of time, really. After all of my talk about how much I love wall paper, and after all of the time I spent on this project...this post was inevitable. First I have to mention that I got the idea for this project from here.
 Emily, I like to think of us as friends, has so many cute ideas and I just couldn't resist adapting this fun project. On a side note, isn't it funny how you start to think of bloggers as friends. The other day I referred to a blogger-not-to-be-named child's birthday and then thought :: I'm talking about this person's child and she doesn't even know I exist. WEIRD!

Anyway, this project was so much fun because it was an inexpenisve and not permanent way to get the look of wallpaper without the comittement. Although, my husband would say that 5 days of painting is commitment enough for him! Last fall I decided that it was time to add something fun to our Master bedroom. I loved the idea of wall paper, but couldn't afford the $plurge. So with a little creativity and some elbow grease we have something that we love even more.

First we will start with the final result, and then I will walk you through how we accomplished it!
 looks like wall paper doesn't it?

This was a stencil. Not the kind that you order and paint, but the kind that we cut out of paper, transferred to the wall with pencil, and then painted on our pencil lines! But I think I am jumping ahead of myself!
Well, the first step was the main wall color for the room. Before Travis and I were married I painted the room, Grey Area by Behr. I loved the color, but as I said I really wanted to change this up in a major way. So lets hit the basics first: 
1. Sample of grey-white paint, Sutble Touch by Behr
2. Paint brush. I wanted something a bit thick, and sturdy (I will explain why later)
3. Stencil
4. patience 

First, I choose a light grey/white color to offset the dark grey on the wall. I wanted to keep the wall relatively neutral, although I have seen other ladies do something similar with bolder color choices. The next step was the design and shape of the stencil. I used something similar to Emily although I think our stencil is larger and I made it thicker. Now, at first it can seem confusing how you make this pattern, but really it just takes a steady hand, and either a dang good eye or a level. Lucky my husband has the first two.

Starting in the center of your focal wall you trace up the wall vertically. Each time you move the stencil make sure that you are lining it up straight with the tracings previously done. After an entire column is stenciled it is time to move over. To make the second column DON'T put your stensil so that your new column is right next to your old column, instead move it over 1/2" and down 1/2"!
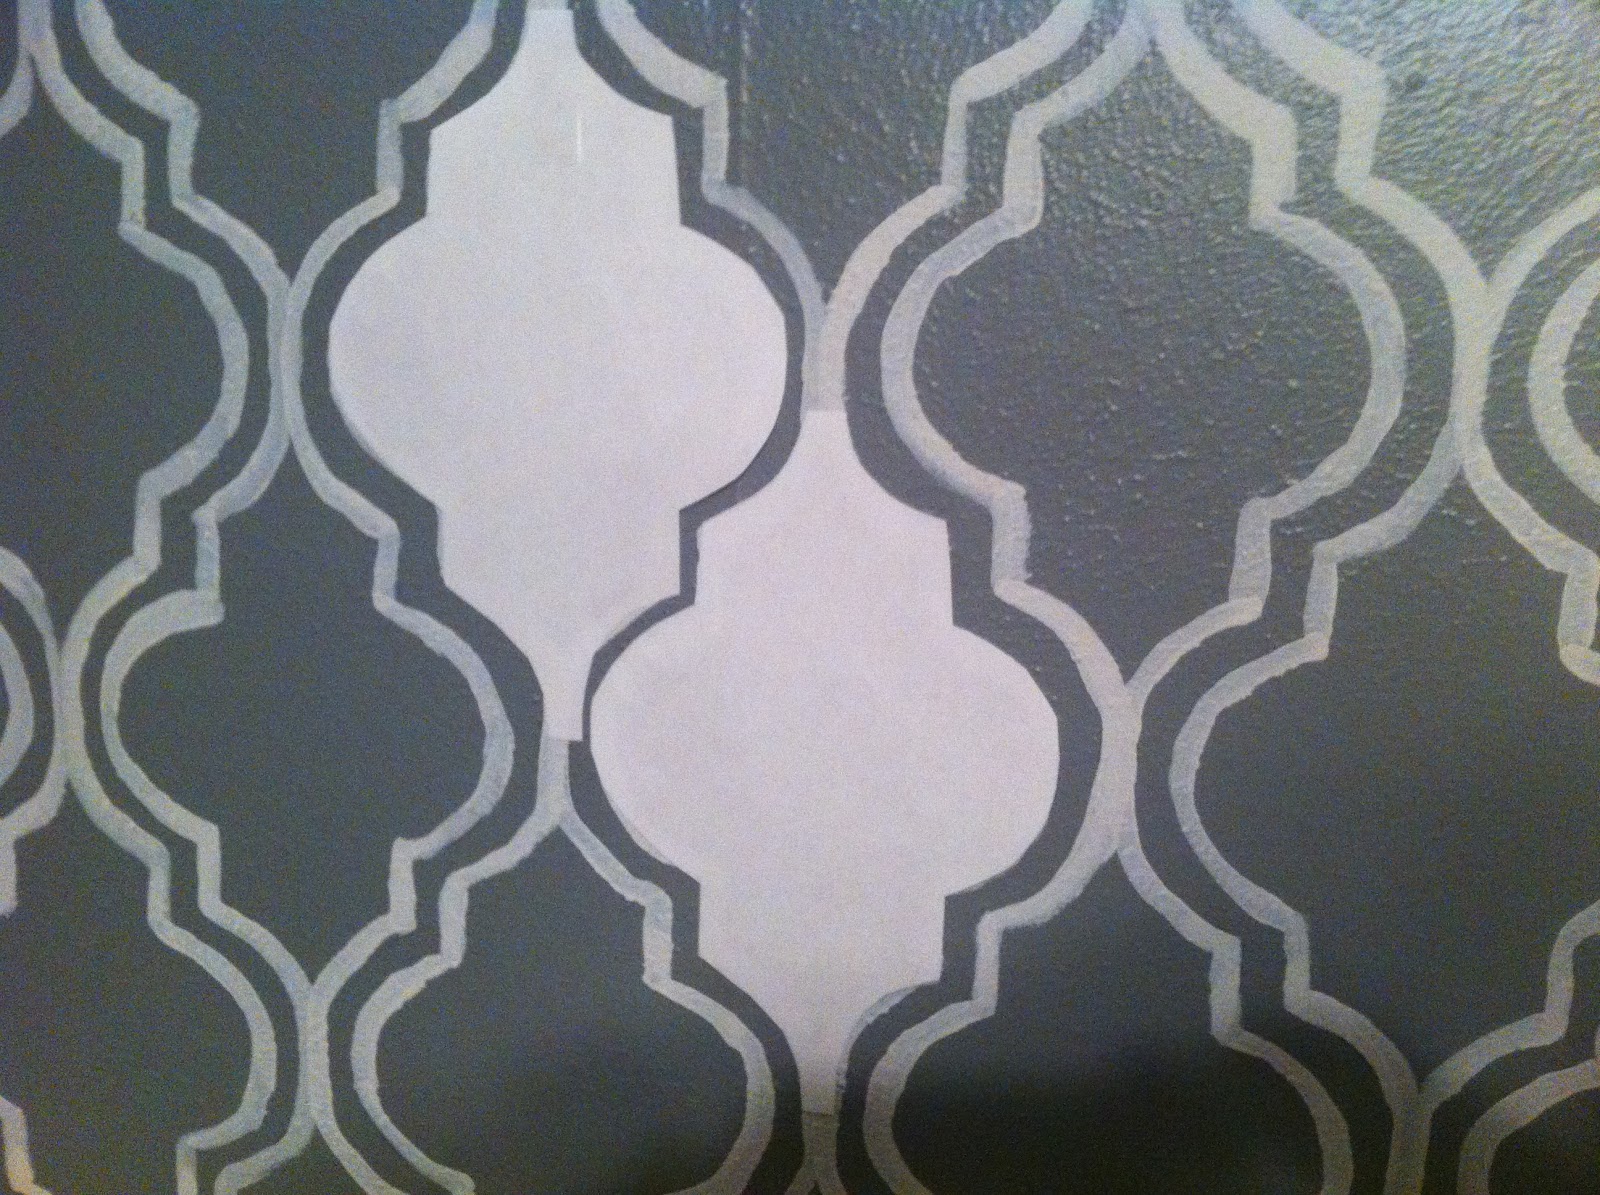
When you move the stencil over and down at the same time it makes the design more intricate and you end up with something similare to this:

If you just move over your pattern would line up and look more like this. Do you see how the stensil in each column touches the column next to it?
                                                   
                                        
 When you compare these images I think it really helps it makes sense. The first images and the second are the SAME stencil. The difference is that the columns are lined up in the same vertical plane in the first, and the stencil is offset about a 1/2" in the second.

Here is an in progress picture. The room became a HUGE mess and we were having to move the furniture around all the time! But I like that you can see the plain grey on the left and compare it to the after.


 So, after your second column is made you start to make your third column. And it lines up with your first. Make sense? 1,3,5,7,9 line up. 2,4,6,8 line up. Rinse Repeat. After you have traced in pencil, we did a wall at a time, pain along the inside of your pencil lines with your brush. I liked using a firm brush, I tried several,  because it made my paint lines the most consistent. The brush can be as thick or thin as you want it.
 

Travis and Sydney hard at work!
I know that I've shown pictures of our room before, so this posts isn't much of a "reveal" but I've gotten so many questions about exactly how we did it that I thought it deserved its own post. We have a bunch of projects in the semi completed phase that I can't wait to show you! Thanks for checking this post out, I really suggest using a stencil (either home made or purchased) if you want to do something different! Its one of the most inexpensive ways to make an impact on a wall or room!

I'm linked up with:

Remodelahlic


Tuesday, July 12, 2011

Hello Friend

Oh, actually, no sorry, I wasn't talking about you. I was talking about a different friend. I was really talking about her. Travis and I LOVE her. And do you know what I love most? How much Travis loves her!
Isn't she beautiful? Saturday the 9th was my birthday. And knowing me as Travis does, he decided that we would spend the afternoon looking for a thrift store console that we can re-do for the new tv that we don't yet have, but plan to buy later! Kinda a perfect afternoon in my book, so after a bite a Belly's cafe we were off! p.s. -- Lubbockites have you ever eaten at Belly's? I hadn't. Its downtown on Ave. Q and 19th-ish right across the street from the big American State Bank. Anyway, its not fancy, but I was pleasantly surprised. More than just a greasy hamburger, anyway.

I'm digressing, sorry. So after we ate and were on our way, I asked Travis if we could stop at Grand Central Station antiques. There is a vendor there that has some beautiful demi johns, which I also love, but don't really see them melding well with our house! Anyway, I still wanted to show them to Travis.
But, while we were browsing her stuff we found our new and much loved friend instead! Now, the other part of the story that you are missing is that we have been looking for something to put at the end of our bed for, well, forever I guess. Anyway, it couldn't be too big because the space is small and for that same reason we wanted something with legs that was not bulky feeling. Not anything with dark wood or fabric because we already have dark charcoals etc. in the room. Anyway, when we saw her we were in love. And then we found out she had a sister, yessss.


Now, I might have passed on these, just because I knew that if we tried to DIY it ourselves we could probably come up with a probably not as pretty, but definitely a less expensive version. Travis however negotiated with this lady, who was surprisingly nice, and we got to take them home with us!
So, here is what they look like in our room. We love them! And now our pillows aren't land mines in the middle of the floor when you get up to go to the bathroom at night!


And, incase you would like to see more birthday related pics...here they are! Travis spent the whole day thinking of things I would like to do. We woke up early in the morning to go garage sale-ing (I have loot to share!), I got my hair done, went thrifting, took a well deserved nap, ate Italian for dinner, and finished the evening with a Humphrey Bogart movie, The Maltese Falcon. Ohhh, and check out the pretty flowers and sunglasses Travis gave me for my quarter century anniversary! {25 is not old, 25 is not old, 25 is, ok I'm getting a little up there}


I love billy balls!
cat-eye sunglases that were inspired by January Jones, not that I am obsessed with her strictly speaking, ok, honestly I am obsessed with her. And mad men. And her.


Thanks for all of the birthday wishes, it was such a fun weekend! Next, I can't wait to show ya'll some of the stuff Travis let me get while thrifting.


Thursday, July 7, 2011

Meet our couch

I know that I told ya'll about the couch that Travis let me buy last year for my birthday. In case you forgot what it started out like here is a quick picture!


Here she is in all of her glory!
We found her at a flea market, and I fell in love with her instantly. Travis and I had wanted a new couch since we married (we had been using my gramma's old couch with a slip cover) but had some issues in deciding what to do. First, we really wanted a sectional, but found that all of the long sleek sectionals we liked didn't fit in our bungalow sized living room. And the ones that would fit....just didn't seem like something we would be interested in after we moved from this house. So, we shelved the idea of a new sectional and started thinking about other options, we actually hadn't decided what to do when we met this gorgeous girl! And all at once, everything made perfect sense. She would fit perfectly in our living room, and once we left this house we would put her in a bedroom to make room for the sectional of our dreams. There was only one hitch; her previous owners weren't even planning on selling her. I had to visit this flea market twice before I finally twisted their arm. I could tell she had been neglected, but her wood frame was intact and her lines were so lovely!

When we got her home we were able to inspect her more closely to see that she really was gonna need some work, and we didn't know how to do it all. After some research we learned that couches of this age had springs that were hand-tied, and all of hers had come loose. We found a local crafstman who could re-tie her springs and fix the webbing on the bottom keeping her all put together.


Before we sent her off, we took needle-nose plyers to her and carefully removed every bit of fabric from her frame!
While she was being worked on we searched for fabric! Now, since we are a young couple not yet burned with the sensibilities of true adulthood we decided that we wanted to something fun. When we do finally get a sectional we will probably opt for charcoal grey that will wear well and hide blemishes, but for now we wanted something different. The green walls of our living room have a smokey hue to them so we started there. Seeking out patterns and options that would be just perfect until we found this: Thomas Paul's Parasols fabric in chartreuse. We instantly were drawn to this choice! Since it is on the dark side we decided to paint the wood frame of the couch white, Dover White by Benjamin Moore, to keep things from being too dark and to give it a punch!


After the springs had been fixed on the couch it was just a matter of a quick paint job and some reupholstering for us to have this:


We are so pleased with our new addition to the living room! Can't wait to show ya'll what its all starting to look like up in here!


To check out tons of DIY's and Before & Afters click on the images below or over to the side. There are so many great ideas out there...

Remodelaholic


Head Board. Stage One. Inspiration.

Making an upholstered headboard can't be that hard right? And when I looked online I found several resources for making a headboard, all a little different, each one with its unique techniques. As I started doing this -- one of the easiest and most popular DIY projects out there -- I couldn't figure out how to go at it. Enter my husband. I have known for some time now that God made us perfect companions to each other, compliments in so many ways, but not until we started this project did I realize how intertwined we are. You see, I couldn't figure out what would work best for us because all I had was the picture of the end in my head. I couldn't figure out how to combine all of the options to get to where I was wanting to go. Thankfully, I married an engineer. Not just an engineer, but a perfectly patient man who could walk me through all of the different options, and explain to me what kind of out come could be expected from each step!


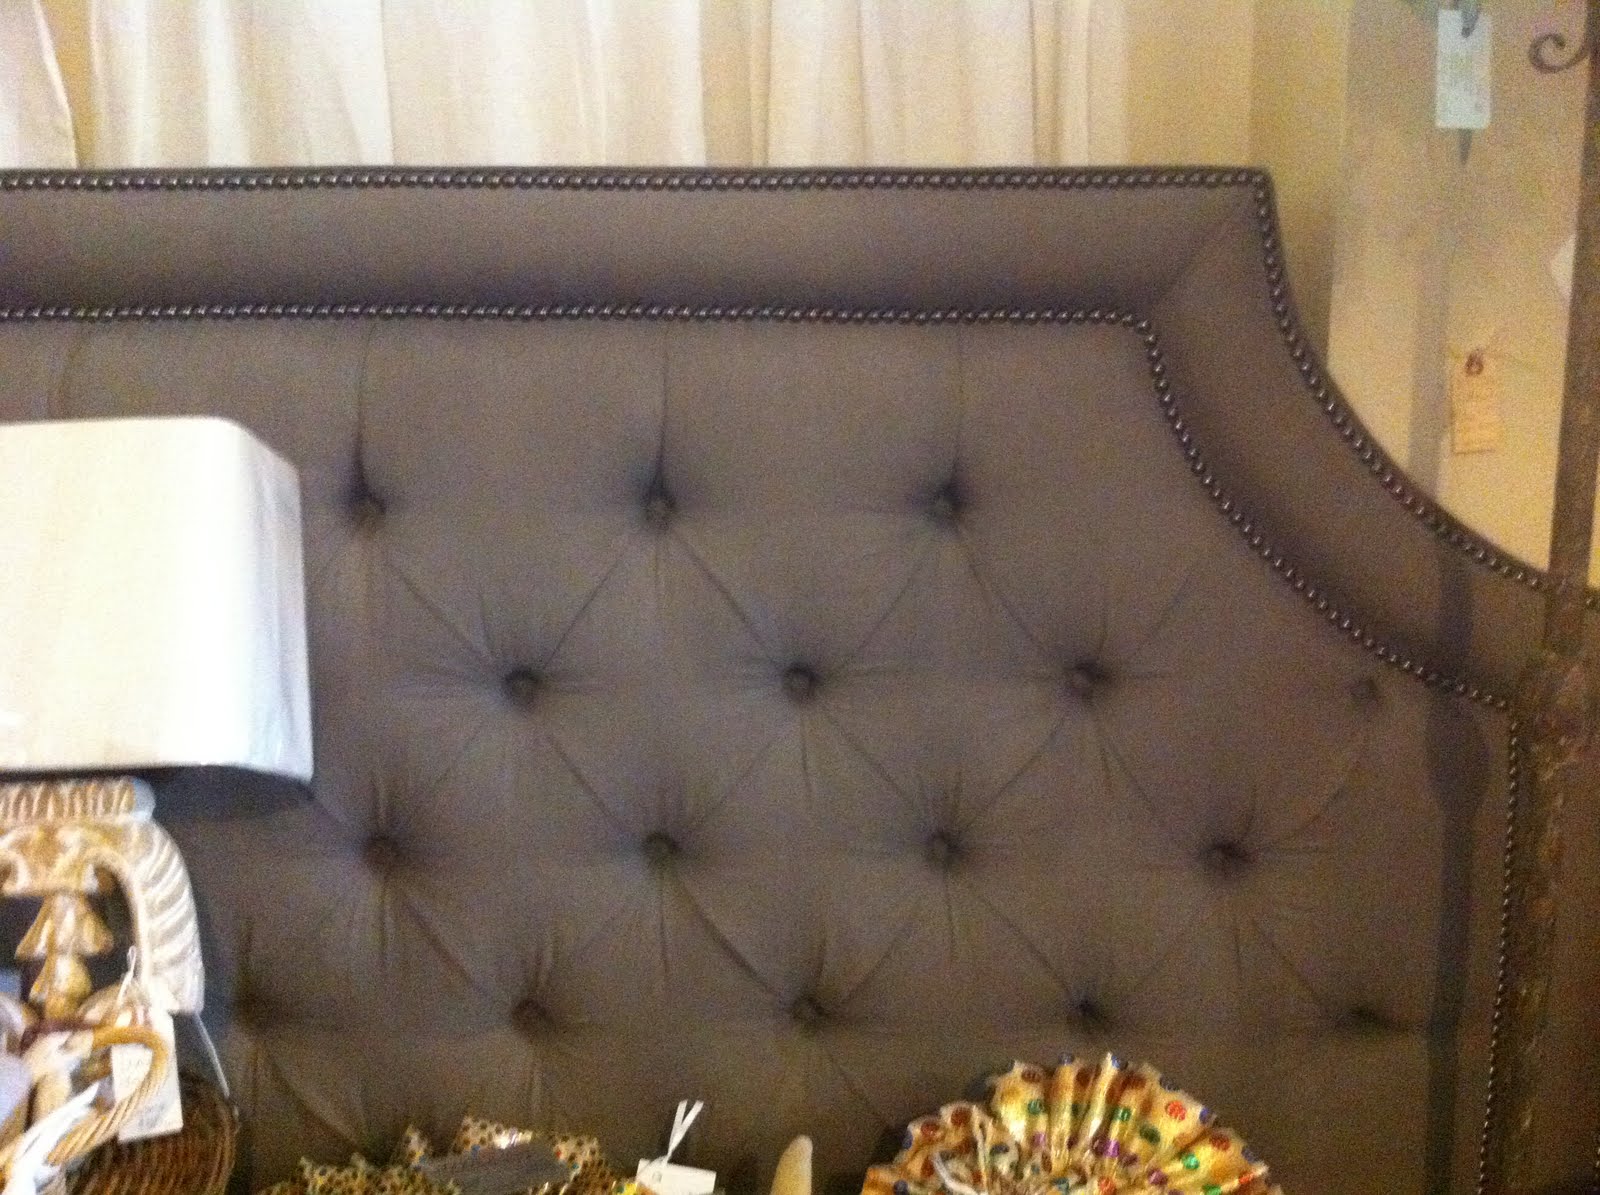
So, where did we start? With some inspiration. I found this lovely head board at a small shop in Houston. Its price tag a meer $2,000+ was not so lovely.


This is what I wanted the head board to look like in the end. But I had so many questions. How tall did it need to be? How large of a circle should we cut out on each corner? I wanted the proportions to be just right. So, what did we do? What else, turn to auto cad!


I know that you can't see all of the details that my husband lovingly put into this auto cad drawing, every single measurement, the tufting and nailhead trim, and the thing of the left? Oh thats what the head board looks like from the side! But the thing that helped me the most was getting to see the scale of the thing. Understanding how changing the arch of the curves, or the width between tufts, or the lines of the nail head would effect the end result. This was exactly what I needed, and so far this was the hardest part!


Now, I know that not everyone has access to auto cad, but the same result can be acheieved by making drawings to scale until you get a result that you like. Trust me, we had to make several adjustments to get to our end result!


So, what did I learn from this project? I used to think that I wasn't crafty or creative or anything. What I realized is that when I did things previously, I wanted my projects to come together without having to think them through, but that just isn't reasonable! So many people that do things themselves and are labeled as "creative" really have to think to work out the details. (and thats ok!) So, now that I am armed with this knowledge I feel like with enough planning and work we can tackle any project we want!

Wednesday, July 6, 2011

Bedroom To Do

I read on a blog recently a list of things to keep you creative, and one of those was to keep to do lists. Now, if I kept one to do list for everything I think it would be overwhelming, understatement of the year! However; since I want to finish up our Master Bedroom first, I thought that a quick (ya, right!) to do list for the bedroom would be a good place to start.


Here is a picture of the bedroom "as is"


Sydney loves to sit on the bed and mess it up just after it is made!


Can you see Sydney?

So, with a few tweaks we will be in good shape! Here are a few pics of the room that we are keeping "as is" essentially the dresser and night stands!


Sunday, December 5, 2010

When we aren't studying...

So, more weeks have passed than I care to admit since I've been able to post pics and update everyone on our lives, but I think that is the nature of life!

Travis and I are both doing well! Travis is working hard and studying a lot as well! I am about to finish my internal medicine rotation, and then we will both have off for Christmas break! Anyway, so the whole purpose of this post is to talk about what we are doing when we aren't studying.

We have quite a few projects that we are working on: we are reupholstering an old couch, repainting an old dresser, and working on other paining and buiding projects for our bedroom! I have promised pictures of the things we have going on now! So here we go:


This is the old couch we are reupholstering -with help from my Aunt. We have now taken off all of the fabric and our couch is getting the springs re-tied and the webbing restrung. We have ordered fabric that should be in soon, hopefully! So all that is left is to pain the couch and reupholster it (thats all, ha)!


This is the fabric that we are going to reupholster it in. Its really cool in person and not quite as dark looking!


This is the picture of the dresser that Travis and I are painting. We finally decided on Martha Stewarts, Weathervane, its a purple so dark it almost looks black. I think it will look great with our grey walls and shiny gunmetal bedspread!


This is the pictures of the mirror that Travis and I made back in September! I'm not able to describe it very well -- so here are the pictures finally! Anyway, I like this much more than most starburst mirrors that I've seen in catalogs and its much cheaper. Also, I'm not sure if you can tell, but this thing is HUGE! The mirror was 14" and the bamboo we cut ranged from 15" to 24" so it fits are large wall very well!
Here is the picture of the mirror on the wall! I think it looks great and I think it will look even better once we have the new couch with the funky fabric sitting below it!
Well; that is a quick update with some things that I have been wanting to share with ya'll!!

Thursday, October 21, 2010

I promise I'm studying

But everyone needs a quick lunch break, right?

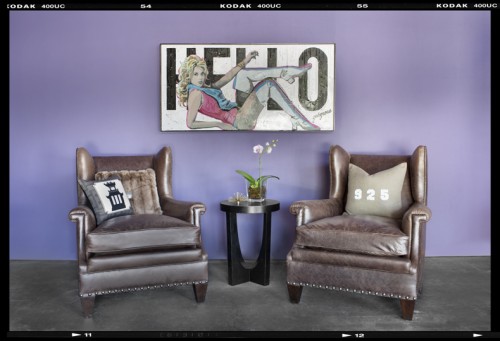
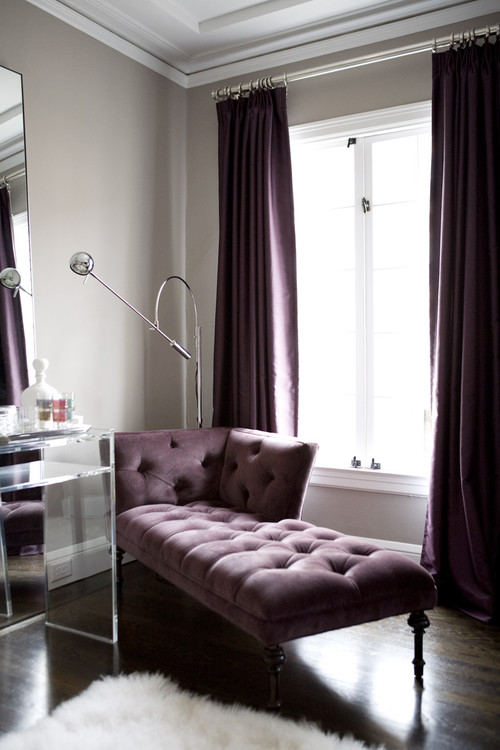
Here are some photos I found on Houzz for our Bedroom inspiration. We will have to see if I can talk Travis into it!

Jane Fonda Inspired Suite eclectic bedroom


Amoroso Design contemporary living room


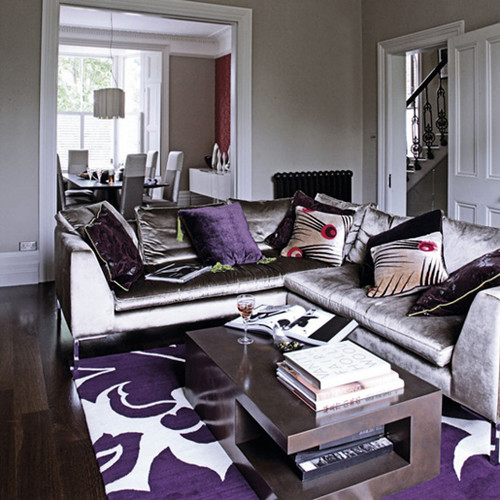
gray purple living rm eclectic living room


Basically, I am wanting to do cool mix of grey, gunmetal, and purple. Something chic, pretty and moody. These pics mainly show the colors I want to use, but not the style. I am still loving the gorgeous, clean mid century look. I want to make a headboard, and of course I am dying to put up wall paper or paint wall paper or something. But I don't know that I have talked Travis into that either!

Ok -- back to studying!

Friday, September 3, 2010

Projects

Since Travis and I have been married I have been trying to learn more about DIY-ing things for our house!

I have a lot of projects in mind and some that I have started that are still in progress. Anyway, as I work/blog about them I plan to put them here so that ya'll can see and give me advice!

Things I am working on now:
refurbishing a flea market find couch
making a Starburst mirror

Ideas:
Making our own upholstered headboard
Painting a wall paper design in our bed room
Making a desk that will seat two for our office
SO much more!!!

If you have any ideas/advice please let me know!